My life as a former FreeBSD systems administrator turned C++ programmer
Rick
This user hasn't shared any profile information
Posts by Rick
Amontec Chameleon POD JTAG Accelerator
01 year
Years ago I was looking for the JTAG accelerator firmware image for the Amontec Chameleon pod. If anyone ever comes across this wanting the same thing, it’s here: amontec_jtag_accelerator_051211.amtsvf
Thanks so much, wayback machine!
Archived www.amontec.com
Unpacking and repacking U-Boot images part 2
2Scripts for working with uImage files
I’ve created a set of python scripts for working with U-Boot image files when phone-hacking. The first script is similar to the U-Boot mkimage tool, only it adds the ability to extract data from existing images.
The next two scripts are particularly for WebOS and meta doctor. These scripts are similar to diff and patch, but they are intended to distribute change instructions for ramdisk image files. More than just a binary patch, these utilities introduce what I call a copy-patch. A copy-patch contains instructions for merging one binary file into another without actually containing the contents of either file. This allows the patch to be distributed without violating the IP rights of the owners of the binary files.
Downloads
Usage examples
Words often don’t explain as well as examples, so I’ll show an example of updating the TP and A6 firmware in a WebOS 2.1.2 image. Note that the patch file does not contain the firmware, so I will have to supply the patch tool with the location of the files I intend to graft into the root file system ramdisk image.
uImage.py usage and listing image information:
# python uImage.py -h
Usage:
        uImage.py -l image
        uImage.py -c [options] image
        uImage.py -x image
        uImage.py -h

Options:
  -h, --help         show this help message and exit
  -l                 list image contents
  -c                 create new image
  -x                 extract image contents

  Creation Options:
    -c -A arch -O os -T type -C comp -a addr -e ep -n name -d
    data_file[:data_file...] image

    -A ARCHITECTURE  set architecture to 'arch'
    -O OSTYPE        set operating system to 'os'
    -T IMAGETYPE     set image type to 'type'
    -C COMPRESSION   set compression to 'comp'
    -a LOADADDR      iset load address to 'addr'
    -e ENTRYADDR     iset entry point to 'ep'
    -n IMAGENAME     set image name to 'name'
    -d FILESPEC      image data from 'datafile'
#
# python uImage.py -l nova-installer-image-broadway.uImage
Image name:     nova-installer-image-broadway-43
Created:        Wed Dec 31 16:00:00 1969
Image type:     ARM Linux Multi-File (uncompressed)
Data size:      12566392 Bytes
Load Address:   0x000000
Entry Point:    0x000000
Header CRC:     0xcf936b92 ... OK
Data CRC:       0x2defc1cd
Contents:
   Image 0: 2610004 bytes
   Image 1: 9956376 bytes

Multi-File Image 0: Header
--------------------------
Image name:     Linux-2.6.29-palm-shank
Created:        Wed Dec 31 16:00:00 1969
Image type:     ARM Linux Kernel (uncompressed)
Data size:      2609940 Bytes
Load Address:   0x208000
Entry Point:    0x208000
Header CRC:     0xfd901980 ... OK
Data CRC:       0xffbe63e6

Multi-File Image 1: Header
--------------------------
Image name:     ramdisk
Created:        Wed Dec 31 16:00:00 1969
Image type:     ARM Linux RAMDisk (uncompressed)
Data size:      9956312 Bytes
Load Address:   0x000000
Entry Point:    0x000000
Header CRC:     0xccd15a95 ... OK
Data CRC:       0xa6d2f9e9
Extracting images:
# python uImage.py -x nova-installer-image-broadway.uImage
Linux-2.6.29-palm-shank.uImage
Linux-2.6.29-palm-shank
ramdisk.uImage
ramdisk
Notice that there were 4 files extracted. Let me explain: The main uImage file is a multi-file type that contains two files: A kernel uImage and a ramdisk uImage. Each of these two files is also a uImage, so uImage.py extracted their contents as well. We are left with 4 files: the ones with .uImage extensions have uImage headers. The other two are the raw data contents.
Now let’s verify that the ramdisk file is a gzipped EXT2 image and then apply the copy-patch:
# file ramdisk
ramdisk: gzip compressed data, was "nova-installer-image-broadway-4", from Unix, last modified: Fri Apr 15 12:01:11 2011, max compression

# zcat ramdisk > nova-installer-image-broadway-4

# file nova-installer-image-broadway-4
nova-installer-image-broadway-4: Linux rev 0.0 ext2 filesystem data

# python ramdiskpatch.py nova-installer-image-broadway-4 2.2.4/usr/lib/ipkg/info/a6-firmware.control 2.2.4/usr/lib/ipkg/info/a6-firmware.md5sums 2.2.4/usr/lib/ipkg/info/pma6updater.control 2.2.4/usr/lib/ipkg/info/pma6updater.md5sums 2.2.4/usr/lib/ipkg/info/pmtpupdater.control 2.2.4/usr/lib/ipkg/info/pmtpupdater.md5sums 2.2.4/usr/lib/ipkg/info/pmtpupdater.list 2.2.4/lib/firmware/a6_firmware.txt 2.2.4/lib/firmware/cy8ctma300e.fw 2.2.4/lib/firmware/cy8ctma300e.ver 2.2.4/usr/bin/PmTpUpdater 2.2.4/usr/bin/PmTpWhich 2.2.4/usr/bin/PmA6Updater 2.2.4/usr/bin/catnip < ramdisk.copyPatch
Patching-in "2.2.4/usr/lib/ipkg/info/a6-firmware.control" .Done.
Patching-in "2.2.4/usr/lib/ipkg/info/a6-firmware.md5sums" .Done.
Patching-in "2.2.4/usr/lib/ipkg/info/pma6updater.control" .Done.
Patching-in "2.2.4/usr/lib/ipkg/info/pma6updater.md5sums" .Done.
Patching-in "2.2.4/usr/lib/ipkg/info/pmtpupdater.control" .Done.
Patching-in "2.2.4/usr/lib/ipkg/info/pmtpupdater.md5sums" .Done.
Patching-in "2.2.4/usr/lib/ipkg/info/pmtpupdater.list" .Done.
Patching-in "2.2.4/lib/firmware/a6_firmware.txt" ..............................................Done.
Patching-in "2.2.4/lib/firmware/cy8ctma300e.fw" ....................................................Done.
Patching-in "2.2.4/lib/firmware/cy8ctma300e.ver" .Done.
Patching-in "2.2.4/usr/bin/PmTpUpdater" ......Done.
Patching-in "2.2.4/usr/bin/PmA6Updater" .............Done.
Patching-in "2.2.4/usr/bin/PmTpWhich" .Done.
Patching-in "2.2.4/usr/bin/catnip" .........................................................................................Done.

Performing binary patches to file system structure ..............................................................................................................................................................................................................................................................................................................................................................................................................................................................
Patch successful!  md5: 1cdb4f76aeacc0ba1760cc6496137e61
Now we’ll re-compress the ramdisk, and make it into a uImage:
# gzip nova-installer-image-broadway-4

# python uImage.py -c -A arm -T ramdisk -C none -n ramdisk -d nova-installer-image-broadway-4.gz ramdisk.uImage
Image name:     ramdisk
Created:        Sun Jun 24 04:01:21 2012
Image type:     ARM Linux RAMDisk (uncompressed)
Data size:      10051920 Bytes
Load Address:   0x000000
Entry Point:    0x000000
Header CRC:     0x1cf594e7 ... OK
Data CRC:       0xcf80cb73
Now we re-combine the extracted kernel uImage and the ramdisk uImage:
# python uImage.py -c -A arm -T multi -C none -n Linux-2.6.29-palm-shank -d Linux-2.6.29-palm-shank.uImage:ramdisk.uImage my-install-image.uImage
Image name:     Linux-2.6.29-palm-shank
Created:        Sun Jun 24 04:04:59 2012
Image type:     ARM Linux Multi-File (uncompressed)
Data size:      12662000 Bytes
Load Address:   0x000000
Entry Point:    0x000000
Header CRC:     0x71281fb4 ... OK
Data CRC:       0x9f1b4262
Contents:
   Image 0: 2610004 bytes
   Image 1: 10051984 bytes

Multi-File Image 0: Header
--------------------------
Image name:     Linux-2.6.29-palm-shank
Created:        Wed Dec 31 16:00:00 1969
Image type:     ARM Linux Kernel (uncompressed)
Data size:      2609940 Bytes
Load Address:   0x208000
Entry Point:    0x208000
Header CRC:     0xfd901980 ... OK
Data CRC:       0xffbe63e6

Multi-File Image 1: Header
--------------------------
Image name:     ramdisk
Created:        Sun Jun 24 04:01:21 2012
Image type:     ARM Linux RAMDisk (uncompressed)
Data size:      10051920 Bytes
Load Address:   0x000000
Entry Point:    0x000000
Header CRC:     0x1cf594e7 ... OK
Data CRC:       0xcf80cb73
And that’s it!
Unpacking and repacking U-Boot uImage files
5Background:
u-boot uImage files have a 64-byte header defined in image.h as follows:
#define IH_MAGIC    0x27051956    /* Image Magic Number     */
#define IH_NMLEN    32            /* Image Name Length      */

typedef struct image_header {
    uint32_t    ih_magic;         /* Image Header Magic Number */
    uint32_t    ih_hcrc;          /* Image Header CRC Checksum */
    uint32_t    ih_time;          /* Image Creation Timestamp  */
    uint32_t    ih_size;          /* Image Data Size           */
    uint32_t    ih_load;          /* Data     Load  Address    */
    uint32_t    ih_ep;            /* Entry Point Address       */
    uint32_t    ih_dcrc;          /* Image Data CRC Checksum   */
    uint8_t     ih_os;            /* Operating System          */
    uint8_t     ih_arch;          /* CPU architecture          */
    uint8_t     ih_type;          /* Image Type                */
    uint8_t     ih_comp;          /* Compression Type          */
    uint8_t     ih_name[IH_NMLEN];    /* Image Name            */
} image_header_t;
According to the u-boot README in the section “More About U-Boot Image Types”:
“Multi-File Images” start with a list of image sizes, each
image size (in bytes) specified by an “uint32_t” in network
byte order. This list is terminated by an “(uint32_t)0”.
Immediately after the terminating 0 follow the images, one by
one, all aligned on “uint32_t” boundaries (size rounded up to
a multiple of 4 bytes).
Install uboot-mkimage from ports:
$ cd /usr/ports/devel/u-boot
$ make install clean
List image header:
$ mkimage -l nova-installer-image-broadway.uImage
Image Name:   nova-installer-image-broadway-43
Created:      Wed Dec 31 16:00:00 1969
Image Type:   ARM Linux Multi-File Image (uncompressed)
Data Size:    12566392 Bytes = 12271.87 kB = 11.98 MB
Load Address: 0x00000000
Entry Point:  0x00000000
Contents:
   Image 0:  2610004 Bytes = 2548 kB = 2 MB
   Image 1:  9956376 Bytes = 9723 kB = 9 MB
This image contains two files, so it is a multi-file image. To extract the two child image files, we must first chop off or skip over the 64-byte header + 4-byte image 0 size + 4 byte image 1 size + 4 byte null terminator = first 76 bytes. Next we’ll extract Image 0 (2610004 bytes long in this example) and image 1 (9956376 bytes long in this example). Note that these two files are also uImage files!
Skip first 76 bytes and extract length of first image:
$ dd if=nova-installer-image-broadway.uImage of=kernel.uImage bs=1 skip=76 count=2610004
2610004+0 records in
2610004+0 records out
2610004 bytes transferred in 46.503855 secs (56124 bytes/sec)
Now I’ll skip 76 bytes + the size of the first image to get the second image:
$ dd if=nova-installer-image-broadway.uImage of=ramdisk.uImage bs=1 skip=2610080
9956376+0 records in
9956376+0 records out
9956376 bytes transferred in 168.836628 secs (58970 bytes/sec)
Let’s look at the kernel image header:
$ mkimage -l kernel.uImage
Image Name:   Linux-2.6.29-palm-shank
Created:      Wed Dec 31 16:00:00 1969
Image Type:   ARM Linux Kernel Image (uncompressed)
Data Size:    2609940 Bytes = 2548.77 kB = 2.49 MB
Load Address: 0x00208000
Entry Point:  0x00208000
And the ramdisk image header:
$ mkimage -l ramdisk.uImage
Image Name:   ramdisk
Created:      Wed Dec 31 16:00:00 1969
Image Type:   ARM Linux RAMDisk Image (uncompressed)
Data Size:    9956312 Bytes = 9722.96 kB = 9.50 MB
Load Address: 0x00000000
Entry Point:  0x00000000
Now let’s pluck off the 64-byte header from the ramdisk:
$ dd if=ramdisk.uImage of=ramdisk bs=64 skip=1
155567+1 records in
155567+1 records out
9956312 bytes transferred in 2.952196 secs (3372511 bytes/sec)
And examine it:
$ file ramdisk
ramdisk: gzip compressed data, was "nova-installer-image-broadway-4", from Unix, last modified: Fri Apr 15 12:01:11 2011, max compression
Now extract it:
zcat ramdisk > nova-installer-image-broadway-4
And examine it again:
$ file nova-installer-image-broadway-4
nova-installer-image-broadway-4: Linux rev 0.0 ext2 filesystem data
So it’s an ext2 filesystem. Let’s mount it under FreeBSD:
$ kldload ext2fs
$ mdconfig -a -t vnode -f nova-installer-image-broadway-4
md0
$ mount -t ext2fs /dev/md0 /mnt
Let’s add a file full of random garbage just for fun:
$ dd if=/dev/random of=/mnt/garbage bs=1M count=1
1+0 records in
1+0 records out
1048576 bytes transferred in 0.237938 secs (4406931 bytes/sec)
$ ls /mnt
bin        dev        garbage    lib        media      opt        sbin       tmp        var
boot       etc        home       md5sums.gz mnt        proc       sys        usr
Now it’s time to unmount the file and package everything back together:
$ umount /mnt
$ mdconfig -d -u 0
Don’t forget to gzip the ramdisk image…
$ gzip nova-installer-image-broadway-4
First create the ramdisk uImage:
$ mkimage -A arm -T ramdisk -C none -n ramdisk -d nova-installer-image-broadway-4.gz ramdisk.uImage
Image Name:   ramdisk
Created:      Wed Jun 20 23:34:59 2012
Image Type:   ARM Linux RAMDisk Image (uncompressed)
Data Size:    11036471 Bytes = 10777.80 kB = 10.53 MB
Load Address: 0x00000000
Entry Point:  0x00000000
Now combine the kernel image and ramdisk image into the final one:
$ mkimage -A arm -T multi -C none -n Linux-2.6.29-palm-shank -d kernel.uImage:ramdisk.uImage nova-installer-image-broadway.uImage
Image Name:   Linux-2.6.29-palm-shank
Created:      Wed Jun 20 23:40:05 2012
Image Type:   ARM Linux Multi-File Image (uncompressed)
Data Size:    13646551 Bytes = 13326.71 kB = 13.01 MB
Load Address: 0x00000000
Entry Point:  0x00000000
Contents:
   Image 0:  2610004 Bytes = 2548 kB = 2 MB
   Image 1: 11036535 Bytes = 10777 kB = 10 MB
Note how the overall image size and image 1 size are 1MB larger than the original from the beginning.
Now let’s test it with novacom. Restart the phone and hold the volume-up key to enter bootie the bootloader. now:
novacom boot mem:// < nova-installer-image-broadway.uImage
Wait a few seconds, then launch novaterm and verify that we booted to the new ramdisk with the 1M garbage file:

nanoBSD for servers – Part 1
113 years
by Rick
in Administration
Warning: This is more of a rambling brain-dump than a carefully revised and edited, or even coherent post.
For a long time now, I've been intrigued by two useful features of FreeBSD: nanoBSD and ZFS.
I like the nanoBSD concept of managing servers as deployable read-only images on ping-pong partitions. That would allow me to build and test an OS/application image and then push it over the network to a remote server without having to go through the mergemaster hassle. It also provides for an instant failsafe in case the upgrade fails.
I've been using ZFS on production servers for about 2 years now. I like that it can tolerate unexpected power interruptions and that I can snapshot file systems before attempting risky modifications. The ability to back-out of bad upgrades can spare me long weekends and trips to a remote site.
Over the years and in the back of my mind, I've been searching for a way to meld the characteristics of nanoBSD and ZFS to create an extremely reliable server able to tolerate far less than ideal environments and also easy to maintain remotely (including OS upgrades). In the worst case, I'd like to have the option of walking somebody through booting a recovery image over the phone so I can finish the job remotely.
The problem with ZFS by itself for purely remote administration manifests when it comes time for an OS upgrade. Snapshots make it possible to roll back, but you still need a reboot to single-user mode and other risky business in order to complete the upgrade itself. It also takes a considerable amount of time (I like to build from source to apply custom build and configuration options).
The problem with nanoBSD for a regular server is that /var is a memory disk and nothing stored there will persist across a reboot. Gone will be the logs, databases, mail, and other important things. There are some simple ways to work around this, but I want complete separation of the OS media and the data/configuration media. I'd really like to have a read-only OS image on one device with ping-pong binary upgrades and all the configuration and data on a raidz pool that's backed-up to another machine using dirvish or rsnapshot.
I'm not the first to attempt some sort of "bigger nanoBSD" or "nanoBSD + ZFS" evolution:
http://www.freebsdnews.net/2010/05/21/minimizing-downtime-nanobsd-zfs-jails/
http://www.psconsult.nl/talks/NLLGG-BSDdag-Servers/paper.pdf
http://lists.freebsd.org/pipermail/freebsd-fs/2007-April/003135.html
http://blog.freenas.org/2010/08/ixsystems-freenas-snapshot.html
I think it's cleaner to separate the configuration and data from the OS and installed software. Data and configuration can be on a raidz pool while the operating system and applications are static and could reside on a separate disk, compact flash, USB drive, CD-ROM, etc. Should the OS media fail, I want the system to automagically revive itself after replacement of a new OS drive without reconfiguration or restoration from backup.
I've considered the idea of updating the applications separately from the OS (something like GoboLinux), but I think that is more trouble than it's worth. Libraries, applications, and OS are all tied together and it makes more sense to rev a single image where libraries applications and OS are compatible rather than try to maintain separate applications and OS and track a compatibility matrix.
My plan is to start with nanoBSD and add a zfs pool with file systems and mount points at /cfg and /var. I'll symlink a directory like /etc/local to /usr/local/etc so I can store /usr/local/etc config data in /cfg along with the /etc data.
If the zfs pool is unavailable, there will be a fallback to a writable memory disk /var and a default recovery configuration on an OS image /cfg partition.
The upgrade procedure will be modified to include creation of zfs snapshots for /cfg and /var so that they can be updated along with the OS, but also rolled-back in case of failure.
I think FreeNAS 8 comes very close to doing what I intend to do, but but its focus is heavily on being a NAS appliance and not as much on being a remotely managed general purpose server. I'll probably pare down the FreeNAS nanoBSD config file as a starting point and add in my particular customizations.
Some particular issues I will need to consider:
- GEOM labeling of the OS drive so it can always be found (tunefs -L) (added already in (not-so)recent versions of nanobsd?)
- Zpool naming scheme and zfs mount point scheme
- handling of zpool.cache and/or importing zpools after swapping OS drives / upgrading
It turns out we don't need zpool.cache at all. It is just as safe to import the zpools we know about on boot. Rather than play games to keep this file happy, we should just do the import always. Email with pjd@ confirms that unless we're booting from ZFS, this file is completely optional and won't really buy us anything since we have another database of zpool data.
We should modify the zpool commands to operate on /etc/zpool.cache and not worry about it from there. This property can be set early in boot so we don't need to modify our backend, I believe. I'll investigate and add the appropriate early boot commands (as well as adding the zpool imports to ix-fstab). This will be more robust anyway and a lot easier to implement than the mount -uw / dancing.
And that's about it for my research and brainstorming. I'm going to take a couple stabs at actually implementing these ideas and hopefully post some successful results soon.
BSDA: PASS!
013 years
I just received my BSDA exam results today and I'm relieved to have passed 🙂
I would encourage others to give it a shot as well. Even though it's supposedly targeted towards junior admins, even developers and senior admins will probably find aspects of it challenging. In the course of study, I discovered some new tools and better ways of doing the same job I've been doing for the last decade.
The exam lived up to most of its promises–the questions were straight-forward and clearly worded and it definitely separates those with real-world experience from those without. Beware Linux admins — the BSDA exam has some Linux-y wrong answers so you'd better be sure of the differences in BSD before attempting it. For FreeBSD admins, a little bit of exposure to the other BSDs is a must, especially the installers, pkgsrc, and upgrade procedures. I don't think I could have passed without having installed each operating system a couple times and learned some of the basic differences between them and FreeBSD. That's not to say that I had to become an expert in those operating systems, however–I think it's sufficient to just be aware of what's different and what what those different things are called.
I almost skipped BSDA entirely because I felt BSDP would be more appropriate and I was holding out for that exam. In point of fact, there are relatively few BSDA certificate holders out there and so it is still a relatively exclusive club. There are no BSDA boot-camps or leaked questions from the exams and the exam itself is psychometrically valid, so I think it's a good goal for BSD administrators looking to validate their abilities and experience. It's a good run-up to the upcoming BSDP exam, which I think will in some ways be easier than BSDA since it will be less broad and more focused on specific real-world tasks.
One thing that keeps surprising me is that out of the huge number of people who registered IDs to be able to sign up for exams, only a very small fraction have actually followed-through and attempted the exam. What's holding people back? The exam is cheap enough that it's practically free, it's challenging and exclusive enough that it's a worthwhile goal, and the inconvenience of taking it at a convention is offset by the positive experience of meeting and interfacing with other working professionals.
Certification doesn't matter in my workplace, but I'm still proud to be certified. I'm proud to have an outside group validate my own personal achievement, I'm proud to be doing my part to advocate BSD and promote BSD awareness, and I'm proud to be doing my small part to support certification–especially for my fellow admins in other countries (and now even here, too), where jobs and education are scarce and any kind of professional training or certification can give them a leg-up.
MeetBSD CA 2010 and BSDA
0MeetBSD CA 2010 is now over. It was an eye-opening experience! There are a lot of good things coming. Let me just highlight a few things, though:
PC-BSD
I don't even know where to begin. PC-BSD is making amazing progress at bringing BSD to the desktop. PC-BSD's pc-sysinstall and PBI system are also making waves in the BSD community. I think these are both going to find their way into FreeBSD eventually.
PC-BSD will soon give you a choice between KDE, Gnome, and Xfce during installation. This is staus:done, it's just waiting for the next release.
There are improvements to the intstaller gui, making some of the choices and defaults more sane and generally easier for people to use.
The next generation PBI system will support digital signatures and decrease bloat by detecting the presense of common (meaning shared by more than one program) dependencies and hardlinking instead of duplicating them.
FreeNAS
With any luck, FreeNAS will soon split into a new, generic appliance framework and a NAS implementation. I know, you weren't at the conference, so what does that mean? FreeNAS is moving away from its roots in PHP and m0n0wall and towards a flexible appliance with configurable, modular behavior based on django apps. Ideally this django box would provide developers with a framework for creating web-managed network appliances such as NAS, firewalls, media servers, mail toasters, or whatever you want.
Kane|Box
It's hard to describe what the Kane-box is because there's not much like it on the market. The website does not do it justice. The Kane-box is a network security appliance that uses "Why the !@# didn't I think of that!?" technology to identify and defend against malicious network traffic. Current IDS systems use attack fingerprints to detect known attacks. The kane-box is more flexible, using Bayesian filters to probabilistically classify network traffic and separate the good from the bad. The attack fingerprint may change, but the filters will still correctly identify the attack. All of this runs under OpenBSD on a custom motherboard. It's fully open-source and priced at just under $200 for the SOHO version and $850 to $1450 for the rackmount versions.
newLISP
newLISP is a LISP-like scripting language for doing things you typically do with scripting languages: programming for the internet, system administration, text processing, gluing other programs together, etc. newLISP is a scripting LISP for people who are fascinated by LISP's beauty and power of expression, but who need it stripped down to easy-to-learn essentials.
Kane-box is built with newLISP, a powerful network scripting language that allows you to quickly and abstractly construct and analyze network packets. Wait, what was that? It's easy to miss the subtle significance of that statement: newLISP allows you to create raw packets for penetration testing just by calling a function with a few arguments. It's a programming language with networking built-in and NOT included as a library. This saves you time by letting you stop copy/pasting your basic network code. Keep it simple and be DRY.
newLISP is extremely small/efficient and ideally suited to a number of network security related tasks.
BSDA
Well I was the only person to take the BSDA exam at MeetBSD. Sure enough, there actually is a non-disclosure agreement that prevents me from talking about the exam questions. My lab experience with NetBSD and OpenBSD was very helpful, though. I had planned to practice playing with package systems and building kernels before the exam, but somehow procrastinated until it was too late. That was a mistake–the experience in those areas would have paid off.
They say that the BSDA exam is broad, and they are right. It's VERY broad. Unless you're in the habit of using all four of these operating sysems daily, there's probably a good chunk of questions on the exam covering commands or issues you've never had to deal with. This is in stark contrast with the BSDP hands-on, where the focus will be on the results and not the implementation. For BSDA, anyway, one needs to venture outside one's comfort zone a little and get some practice with the OTHER utilities that do the same thing your favorite ones do, just with a completely different syntax.
A good point was raised yesterday about BSD certification in general. Right now the actual number of people who have taken the exam is quite low–an order of magnitude less than the number of people who expressed interest in taking the exam. There are many people in the BSD community who might be interested in the BSD certification initiative, but can't find a reason to take the exams themselves. If nothing else, do realize that taking the exam supports the BSD community directly. The exam is not about profit–the fees go to cover the costs of creating and proctoring the exams. The more people who take the exam, the more momentum in builds and the more it gets awareness of BSD out there. Even if you think it is beneath your abilities or irrelevant to the work you do with BSD, getting certified and telling people (bosses and vendors) about it helps the other certificate holders and shows the world that BSD is niether dead nor an academic playtoy. The question pool is a closely guarded secret so you can't go to a bootcamp and memorize the answers. At this stage, the only way to know the correct answers is to actually have experience performing the tasks listed in the exam objectives. There is some trivia about the different ways of doing things in the various *BSDs, but the exam itself is not silly trivia. Even though the BSDA is claimed to be targeted at junior admins with 6 months of experience, I personally think that may be a stretch. Don't let those words fool you–the BSDA exam is broad and comprehensive and I am almost sure an old dog can be taught new tricks whilst preparing for it.
BSDA Lab, Day 2
0Reflecting on Day 1
Yesterday I obtained and installed the 4 major BSD's in a virtual machine. Each had its own compatibility issues with VirtualBox, but I found ways around that. Were I to do it all over again, I might try running aqemu on a PC-BSD host instead of VirtualBox on a Windows host.
I noticed that every installer gave me an opportunity to drop to a shell to troubleshoot a broken system. All but DragonFlyBSD had an upgrade option. It turns out that NetBSD and OpenBSD prefer binary upgrades, while DragonFlyBSD prefers source upgrades and FreeBSD is fairly comfortable with both. I'll revisit upgrading on another day.
OpenBSD, NetBSD, and FreeBSD let you choose what base parts of the operating system you wish to install. OpenBSD and NetBSD call these sets, while FreeBSD refers to them as distributions or distribution sets. DragonFlyBSD doesn't give you much of a choice.
FreeBSD's sysinstall lets you install to UFS1 and UFS2 filesystems, with or without softupdates. NetBSD's sysinst offers up FFSv1, FFSv2, and LFS. OpenBSD seems to only support installing to UFS1.
Today's Objectives
- Configure basic network settings (hostname, resolver, IP address, DHCP, etc.)
- Determine open ports on each system
- Verify availability of network services
- Query DNS
- Configure NTP
- Enable sshd and disable root logins
- Set and remove interface aliases
- Review IPv4 and IPv6 theory
In a word: Networking. Probably the first thing you want to do after installing a system is get it connected to the network so you can download additional updates and software. All of the tasks listed for today are actually quite easy and any UNIX admin should know how to do these on at least one operating system. The main point of today's lab is to explore the subtle differences between each operating system.
Network Theory Review
If you've ever gone for a basic network certification like CCNA, there should be little to worry about. My biggest concern is with IPv6 theory, since I've never had a need to deal with it in 11 years of administering servers. I'm just going to leave some links here that cover all the theory listed in the BSDA requirements publication:
IPv4
Classful Networks
CIDR
Subnetworks
Subnetting Reference
Network Notation Conversions
IPv6
IPv6 overview
IPv6 Autoconfiguration
Types of IPv6 Addresses
More Information
DHCP for all
I want to start with the simple case of getting all the config information via DHCP. My VM host is set to be a DHCP server to all the virtual interfaces.
Right away I notice that only NetBSD's dhclient supports the -r option to release a lease. Otherwise there's not much special here — just issue dhclient interface to obtain or renew a lease from the command-line.
Making it stick
Enabling automatic DHCP at boot for an interface is a little different depending on the operating system. For FreeBSD and DragonFlyBSD, Edit your /etc/rc.conf to include the following:
ifconfig_fxp0="DHCP"
Where fxp0 is your network interface.
Under NetBSD, edit /etc/rc.conf and set the following:
dhclient=YES
This will turn dhclient on for all interfaces. To list the interfaces explicitly, add:
dhclient_flags="wm0"
where wm0 is the list of interfaces to run dhclient against.
In OpenBSD, make a file /etc/hostname.em0 were em0 is the interface name, and set its contents to dhcp.
Manual Network Configuration
Now we want to set an address, subnet mask, default route, hostname, and DNS servers manually. Let's look to the handbooks for instructions:
FreeBSD and DragonFlyBSD:
http://www.freebsd.org/doc/handbook/config-network-setup.html
Scroll down to Configuring the Network Card. Some lines are added to /etc/rc.conf and /etc/resolv.conf
NetBSD:
http://www.netbsd.org/docs/network/index.html#configuration_files
NetBSD seems to have a couple ways to configure the network settings. It supports /etc/rc.conf settings, as well as /etc/myname, /etc/mygate, /etc/ifconfig.IF, and /etc/resolve.conf. So much for KISS…
OpenBSD:
http://www.openbsd.org/faq/faq6.html#Setup
Looks like /etc/myname, /etc/mygate, /etc/hostname.IF, and /etc/resolv.conf. That's not so bad.
Don't forget to be aware of how the different systems change the order of name resolution:
http://www.bsdnewsletter.com/bsda-book/Change_the_order_of_name_resolution.html
Verifying Network Settings
In order to verify the current network settings on any system, we should all know:
ifconfig -a
netstat -rn | grep default
cat /etc/resolv.conf
hostname
Determine Open Ports
Looking at the list of commands given for this section of the BSDA requirements, I think they want us to know how to list open sockets and files as well. Things to note: OpenBSD doesn't have sockstat, lsof and nmap are not in the base distributions.
Here are the commands I like to use to check for open ports and established connections:
sockstat -cl
sockstat -l
netstat -a | grep LISTEN
netstat -a | grep ESTABLISHED
Of course nmap is used to probe local and remote systems for open and filtered ports. I've never used lsof but apparently it stands for "list open files" and it is useful for determining what process has a death grip on a file. Or you could just use fstat.
Enable NTP on All Systems
Let's get all the servers to have the correct time via NTP.
DragonFlyBSD:
dragonfly# echo dntpd_enable="YES" >> /etc/rc.conf
dragonfly# /etc/rc.d/dntpd start
Starting dntpd.
FreeBSD:
freebsd# echo ntpd_enable="YES" >> /etc/rc.conf
freebsd# /etc/rc.d/ntpd start
Starting ntpd.
NetBSD:
netbsd# echo ntpd=YES >> /etc/rc.conf
netbsd# /etc/rc.d/ntpd start
Starting ntpd.
OpenBSD:
OpenBSD is a little bit different. There is no /etc/rc.d/ directory and the /etc/rc.conf file should not be edited. Instead, put startup overrides in /etc/rc.conf.local. See http://www.openbsd.org/faq/faq10.html#rc for more startup information.
openbsd# echo ntpd_flags="" >> /etc/rc.conf.local
openbsd# ntpd
openbsd#
Some BSDs also have a command ntpdate which synchronizes time once and exits. Ntpd's servers can be set in /etc/ntpd.conf. Ntpd will not normally make a large adjustment to the system clock. To force ntpd to set the time now instead of synchronizing slowly, use ntpd -s or ntpd -q depending on the operating system.
Enable SSH Logins For !Root
Disabling root logins via ssh is too easy. Just edit /etc/ssh/sshd_config and uncomment or edit:
PermitRootLogin no
Now to enable sshd at startup and manually start it on each system:
DragonFlyBSD and FreeBSD:
# echo sshd_enable="YES" >> /etc/rc.conf
# /etc/rc.d/sshd start
Starting sshd.
NetBSD:
netbsd# echo sshd=YES >> /etc/rc.conf
netbsd# /etc/rc.d/sshd start
Starting sshd.
OpenBSD:
openbsd# echo sshd_flags="" >> /etc/rc.conf.local
openbsd# /usr/sbin/sshd
openbsd#
Nothing to it.
Verify Availability of Network Services
So we're supposed to know how to use ping, traceroute, telnet, and nc (netcat) to verify and troubleshoot network services.
OK, there's not that much to know about ping and traceroute that you won't turn up in the first 2 minutes of searching. Remember that ping isn't the end-all to verifying a hosts's availability since ICMP echo messages are often blocked by routers and firewalls. Failed replies and timeouts when running traceroute are not necessarily problems for similar reasons. Times are round-trip. Anybody taking this exam ought to have experience with both of these.
Telnet is great for testing TCP connections. Remember it won't work for UDP. Let's use it to verify SSH on all our lab systems. Remember that /etc/services maps names to ports, so we can check it and see that ssh is on port 22. We can use either of these commands to see if sshd is responding:
# telnet localhost 22
Trying 127.0.0.1...
Connected to localhost.
Escape character is '^]'.
SSH-2.0-OpenSSH_5.5
^]
telnet> quit
Connection Closed.
#

# telnet localhost ssh
Trying 127.0.0.1...
Connected to localhost.
Escape character is '^]'.
SSH-2.0-OpenSSH_5.5
^]
telnet> quit
Connection Closed.
#
So you specify the port as a parameter on the command-line. The port can be either numeric or a word from /etc/services. Control-] is the way to escape to the telnet prompt and forcibly close the connection. This is still child's play.
How about netcat. I've used nc for creatively piping things across the network, but not so much for verifying services. Have a tutorial about netcat if you've never used it before. OpenBSD and FreeBSD have netcat in the base, so let's portscan localhost and verify http on google:
# nc -z localhost 1-100
Connection to localhost 22 port [tcp/ssh] succeeded!
Connection to localhost 25 port [tcp/smtp] succeeded!
#

#nc -z google.com 80
Connection to google.com 80 port [tcp/http] succeeded!
#
OK wonderful. It's not as fast as nmap (no parallelization), but nc scanned tcp ports 1 to 100 and found ssh and smtp open. Then we used nc to verify something is listening to port 80 on google.com. Use the -u option to test udp ports.
Querying a DNS Server Like a Pro
All platforms support nslookup, dig, and host. All three of these utilities do pretty much the same thing, but dig is the preferred tool these days.
nslookup is old and quirky. It can be a pain in the butt to learn to use properly and all the time I put into it is probably why I have such a hard time stopping using it 🙂
host is the simplest to use, but can still tell you what you need to know.
dig is the most configurable, giving you the most control over what and who you query.
I think it's important to remember that these tools are their own recursive resolvers. They don't use the system's facilities for name resolution and therefore they don't care much about nsswitch.conf or your hosts file. If you don't specify a server, however, then they will look for one in resolv.conf.
I think the skills they are looking for go beyond simply checking if a hostname resolves and doing a reverse lookup on an IP address. You should know how to use nslookup, dig, and host to test and troubleshoot a DNS server. Know how to query a server and verify that it is authoritative, be able to query for specific record types (SOA, A, MX, PTR, TXT, NS) and know what they are and the information they are supposed to contain. Also know how to use these tools to attempt a zone transfer, which is important both for verifying that the transfer works and for verifying security (it's bad form to transfer your zones to just anybody who asks). It goes without saying that you're expected to understand how DNS works and you should have some experience troubleshooting and maintaining a DNS server.
Here are some great links if you need brushing up in this area:
http://www.bsdnewsletter.com/bsda-book/Query_a_DNS_server.html
http://uw713doc.sco.com/en/NET_tcpip/dnsC.nslook.html
http://www.tuaw.com/2007/01/29/monday-man-page-dig-host-and-nslookup/
Set and Unset Interface Aliases
This is very basic and yet also important. A NIC is usually associated with a single, primary IP address, but it's possible to configure additional, simultaneously active addresses called aliases. There are many reasons why you might need to or want to do this. You may want to run multiple services on a single machine but with different configurations, maybe you want to use IP based virtual hosting (necessary for https virtual hosting), perhaps you want to NAT individual internal subnets to different external IP addresses for different traffic shaping policies or just to be able to differentiate the source networks for future troubleshooting. Maybe you need something entirely different. In any case, knowing how to configure an interface for multiple IP addresses (and how to remove those addresses without taking the interface down) is just something we expect of a UNIX sysadmin.
At this time, the latest distributions of all the BSDs support the ifconfig options alias and -alias. You can also use delete instead of -alias, but it may not work for IPv6 addresses on all systems. FreeBSD and DragonFlyBSD also support add as a synonym for alias. I really think this is a bit of trivia and I hope they don't ask questions about which operating systems support which arguments. That information is in the man pages. What's more important is that you know how to add and remove aliases without clobbering the primary IP address.
So let's just add some aliases:
# ifconfig em1
em1: flags=8843<UP,BROADCAST,RUNNING,SIMPLEX,MULTICAST> mtu 1500
        lladdr 08:00:27:d1:b8:ee
        priority: 0
        media: Ethernet autoselect (1000baseT full-duplex)
        status: active
        inet6 fe80::a00:27ff:fed1:b8ee%em1 prefixlen 64 scopeid 0x2
        inet 192.168.56.101 netmask 0xffffff00 broadcast 192.168.56.255

# ifconfig em1 inet 10.1.1.1 netmask 255.255.255.0 alias
# ifconfig em1 inet 10.1.2.1 netmask 255.255.255.0 alias
# ifconfig em1 inet 10.1.3.1 netmask 255.255.255.0 alias

# ifconfig em1
em1: flags=8843<UP,BROADCAST,RUNNING,SIMPLEX,MULTICAST> mtu 1500
        lladdr 08:00:27:d1:b8:ee
        priority: 0
        media: Ethernet autoselect (1000baseT full-duplex)
        status: active
        inet6 fe80::a00:27ff:fed1:b8ee%em1 prefixlen 64 scopeid 0x2
        inet 192.168.56.101 netmask 0xffffff00 broadcast 192.168.56.255
        inet 10.1.1.1 netmask 0xffffff00 broadcast 10.1.1.255
        inet 10.1.2.1 netmask 0xffffff00 broadcast 10.1.2.255
        inet 10.1.3.1 netmask 0xffffff00 broadcast 10.1.3.255
#
And now remove a couple aliases:
# ifconfig em1 10.1.2.1 -alias

# ifconfig em1
em1: flags=8843<UP,BROADCAST,RUNNING,SIMPLEX,MULTICAST> mtu 1500
        lladdr 08:00:27:d1:b8:ee
        priority: 0
        media: Ethernet autoselect (1000baseT full-duplex)
        status: active
        inet6 fe80::a00:27ff:fed1:b8ee%em1 prefixlen 64 scopeid 0x2
        inet 192.168.56.101 netmask 0xffffff00 broadcast 192.168.56.255
        inet 10.1.1.1 netmask 0xffffff00 broadcast 10.1.1.255
        inet 10.1.3.1 netmask 0xffffff00 broadcast 10.1.3.255

# ifconfig em1 10.1.3.1 delete

# ifconfig em1
em1: flags=8843<UP,BROADCAST,RUNNING,SIMPLEX,MULTICAST> mtu 1500
        lladdr 08:00:27:d1:b8:ee
        priority: 0
        media: Ethernet autoselect (1000baseT full-duplex)
        status: active
        inet6 fe80::a00:27ff:fed1:b8ee%em1 prefixlen 64 scopeid 0x2
        inet 192.168.56.101 netmask 0xffffff00 broadcast 192.168.56.255
        inet 10.1.1.1 netmask 0xffffff00 broadcast 10.1.1.255
#
Making the aliases stick
Now to preserve aliases across reboots in the various BSDs:
DragonFlyBSD and FreeBSD:
Add a line to /etc/rc.conf for each alias like:
ifconfig_em0_alias0="inet 192.168.1.5 netmask 255.255.255.255"
Of course change em0 to your actual interface name and increment the number at the end of alias# for each alias.
OpenBSD:
Add aliases to the /etc/hostname.if files:
# cat /etc/hostname.dc0
inet 192.168.0.2 255.255.255.0 NONE media 100baseTX
inet alias 192.168.0.3 255.255.255.255
inet alias 192.168.0.4 255.255.255.255
NetBSD
Add aliases to /etc/ifaliases in the format address interface netmask:
# cat /etc/ifaliases
10.1.2.1 wm0 255.255.255.255
Wrapping Up
Now we've explored the differences in network configuration between OpenBSD, DragonFlyBSD, FreeBSD, and NetBSD. We should be able to get essential networking up immediately after installation and configure sshd for remote administration. We can troubleshoot routing and DNS problems and verify that network services are listening and responding.
I didn't cover the route command but you should know how to add and delete routes, including the default route to the gateway. All but FreeBSD support the command route show, but it's more compatible to use netstat -r.
BSDA Lab, Day 1
0Objectives
The objectives for the first day are:
- Learn the release location and naming/numbering scheme used by FreeBSD, OpenBSD, DragonflyBSD, and NetBSD.
- Download the latest release install ISOs for each operating system.
- Practice installing each operating system to real hardware or a virtual machine to gain familiarity with the different installers.
- End with working installations of each operating system to use for further practice.
These objectives may be simple, but they are important. The result of today's lab will form the basis of all future labs, so it deserves some time. It will also take some time to download the four install images.
Releases
FreeBSD
FreeBSD has a helpful release engineering (RELENG) page: http://www.freebsd.org/releng/
There are different branches for each major, minor, and development versions. The important concepts here are the differences between a RELEASE, STABLE, and CURRENT. Briefly, CURRENT is the unstable, cutting-edge development branch that should usually not be used in production. STABLE is the active development branch associated with the current official release. STABLE is suitable for production environments that want the most up-to-date features, bugfixes, and security fixes. Every now and then, a STABLE snapshot becomes a minor RELEASE. A RELEASE is immutable except for security updates.
Know that the latest release is 8.1 and that 9.0 is being worked on in -CURRENT.
NetBSD
NetBSD has a page on formal releases here: http://www.netbsd.org/releases/formal.html
NetBSD also has a -CURRENT branch with the latest unstable development code. Formal Releases are intended for production use and are updated with security and bug fixes. Both release 4 and release 5 are currently supported, with the latest release being NetBSD-5.0.2.
OpenBSD
OpenBSD also has -STABLE and -CURRENT branches (http://www.openbsd.org/stable.html and http://www.openbsd.org/faq/current.html)
As usual, CURRENT is unsuitable for production and STABLE tracks the latest features and fixes. The latest release of OpenBSD is 4.7, with 4.8 coming out in a matter of weeks.
DragonflyBSD
DragonflyBSD has -DEVELOPMENT and -RELEASE branches which are similar to CURRENT and STABLE in other BSD operating systems. The current release is DragonflyBSD-2.6.3.
Obtaining Installation Images
FreeBSD
Read the announcement page for the latest release: http://www.freebsd.org/releases/8.1R/announce.html Pay attention to the availability section which describes the various downloadable images. The DVD and memstick images are the most complete. The livefs image is only useful for repairs, not for installation. The bootonly image supports network installations and the disc1 cd image contains enough to install a release but has no binary packages. I'm going to get the i386 DVD image for my development environment: http://www.freebsd.org/where.html
NetBSD
We can follow the download links right off the main page to an FTP ISO mirror. Remembering that the latest release is 5.0.2, there are countless files listed on the FTP site: 2 for every architecture supported. I'm going to get the i386cd-5.0.2.iso image.
OpenBSD
OpenBSD has boot-only ISOs for network installs and full-install CD ISO images for networkless installs. The only way to get the precompiled binaries is to order the official CD set. I'm going to download the install47.iso image from the /pub/OpenBSD/4.7/i386/ directory of a mirror.
DragonflyBSD
DragonflyBSD make it very easy to choose a download. I'm going to get the i386 CD file from http://www.dragonflybsd.org/download/ and then extract dfly-i386-2.6.3_REL.iso from it.
Setting up a virtual environment
I don't want to mess with a quad-boot system, four real computers, or swapping 4 drives in and out of a single computer. I'm going to save myself a little time and space by creating 4 separate virtual machines in VirtualBox. I'm not going to cover the details of that here. There must be a dozen how-to's that cover this topic thoroughly already.
The only thing I will point out with VirtualBox is how to overcome certain bugs:
You may experience kernel panics with installing FreeBSD. If so, change your virtual hard drive controller from IDE to SATA and the problems will go away.
VirtualBox and OpenBSD do not get along well. Try changing the OS Type in VirtualBox to "FreeBSD" when installing OpenBSD. The segfaults tend to go away once you get the OS installed.
VirtualBox just HATES NetBSD. To get it to run without crashing, manually start the VM with a syntax like this:
$ VBoxSDL –nopatm –startvm <name of your vm>
Use "FreeBSD" as the OS Type for DragonflyBSD. At the installer boot menu, choose option 6: Boot DragonFly Without AHCI Driver.
Installing FreeBSD
FreeBSD uses a text menu-based installer called sysinstall. Follow the installation guide in the handbook: http://www.freebsd.org/doc/handbook/install-start.html Be sure to click the "Next" links on the handbook website and read the extensive pages documenting the various menu sections of sysinstall. Don't skip the post-install section, these steps are relevant to the BSDA exam as well.
Installing NetBSD
NetBSD uses a test menu-based installer called sysinst. It sounds similar to FreeBSD's sysinstall, but it is more basic. Follow the example installation here: http://www.netbsd.org/docs/guide/en/chap-exinst.html
Installing OpenBSD
This will be the most manual installation since there are no menus or abstractions of fdisk and disklabel. Your guide is here: http://www.openbsd.org/faq/faq4.html. Take note of the following quote from the wiki:
A BSDA candidate should be familiar with the different installation methods, the options presented once the installer is started (Install/Upgrade/Shell), and setting up disks using fdisk(8) and disklabel(8). The candidate should also know the different installation sets to be installed and what each one adds to the system, how to merge changes in case of update. After the first reboot the BSDA applicant should be able to add and delete users and groups, to add and remove packages and to secure the system. These points will be discussed in greater depth later in the book.
We'll learn the user and package management another day. For now, let's just focus on getting all the operating systems installed and get comfortable with the different installers.
Installing DragonflyBSD
DragonflyBSD uses the BSD Installer. It's a fairly simple and lightweight text menu-based installer. Follow the short instructions here: http://www.dragonflybsd.org/docs/newhandbook/Installation/ and you should be done in no time.
Wrapping up
Although "Install four operating systems" sounds like simple task to devote a whole day to, there's actually quite a lot of ground to cover. Spend some time on each BSD's home page and try to remember what the current stable version is for each operating system. It wouldn't hurt to practice navigating to the correct download location for each release ISO a couple of times, too.
I don't think it's enough to simply get each of these operating systems installed once and then move on. I would run through the full process of booting the install media and installing each OS several times until it starts to feel like second nature. I don't know about you, but my personal objective is to really understand what I'm doing and feel comfortable should I ever have to do this again in the future. The whole point of the BSD certs is to demonstrate real, practical knowledge and not to braindump in the style of bootcamp training.
BSD{A,P} Certification
0The recent announcement about the completion of the BSDP certification requirements got me thinking about the BSD certification effort again. It's been over a year since the last time I gave it any attention but I looks to have taken off. The BSDA exam has been going since 2008 and the BSDP exam is going to be available sometime in 2011. I decided to give BSDA a shot next month at MeetBSD California.
I've been having a hard time figuring out just what to expect and how to go about preparing, though. It's almost as if everybody who's ever taken the exam had to sign an NDA promising never to describe the exam process publicly. There's no "official" courseware, but we do have the certification requirements and a wiki. There's also this nice rendition of the wiki content.
I've managed to find a little more information on the exam itself which I'll rattle off here. Don't take my word as gospel, though–my information might contain mistakes or have been interpreted incorrectly. Here's what I'm expecting:
The BSDA exam is a written exam without a hands-on portion. The questions are multiple choice or true/false and there should be roughly 100 questions. There may be additional questions on the exam used for the psychometric feedback loop but that don't count towards your final score. The exam is not simply graded correct/incorrect and assigned a percentage score. It is sent off to be statistically analyzed with batches of other exams. Scores will range from 200 to 700, with 500 marking the pass/fail threshold. The exam covers FreeBSD, NetBSD, OpenBSD, and DragonflyBSD.
The BSDP exam will be both written and hands-on via a virtualized lab. While the BSDA exam requires a general knowledge of the basics of installing and administering 4 operating systems, the BSDP hands-on portion will require deep knowledge of at least one of them. At this time, details of the exam are still emerging.
The exam fee is a modest $75. In order to take the exam, you must first register for a free BSDCG ID, register for an exam session, and pay the fee online before taking the exam. All of these steps are done over at http://www.bsdcertification.org/. Apparently some people have shown up to take the exam without having paid in advance. If you have the cash on hand, you may be able to still take the exam, but it's better to do it right and pay online in advance.
I suspect many people will have some experience in one or two of the 4 main BSD operating systems, but not all. There will likely be questions testing some of the differences between these 4, so it would be a very good idea to get a copy of each OS (or get the official BSDA DVD for $40 which has them all) and practice installing them to real hardware or in a virtual machine (qemu, vmware, virtualbox, etc). Areas to focus on are the different installers, source and binary packaging systems, different firewall systems, and nuances in network configuration. You should also know the release locations and numbering/naming schemes used by each operating system.
I'm most familiar with FreeBSD. I'm going to have to put in a little effort to familiarize myself with the other *BSD's on the exam, and as I do, I plan to chronicle my efforts here in the hopes that it may be useful to somebody else.
Using Fixit and chroot to repair a non-booting system
014 years
The trick:
You want to boot off a live CD (or USB stick) and use your system as if you had booted into single user mode.
The problem:
Booting off a CD means you have to mount your filesystems to a subdirectory. You keep editing the livecd's files by mistake instead of your installation's.
The solution:
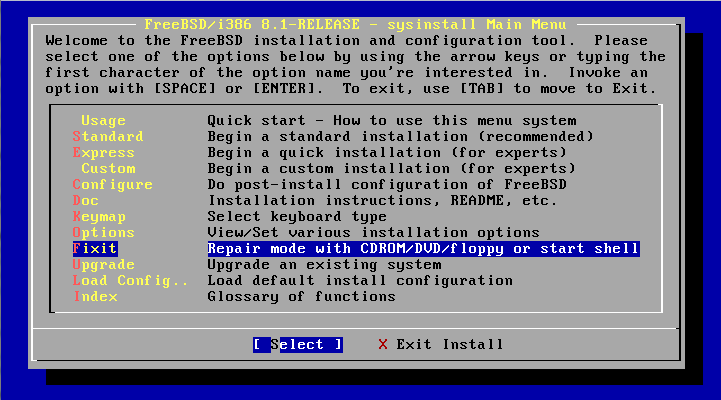
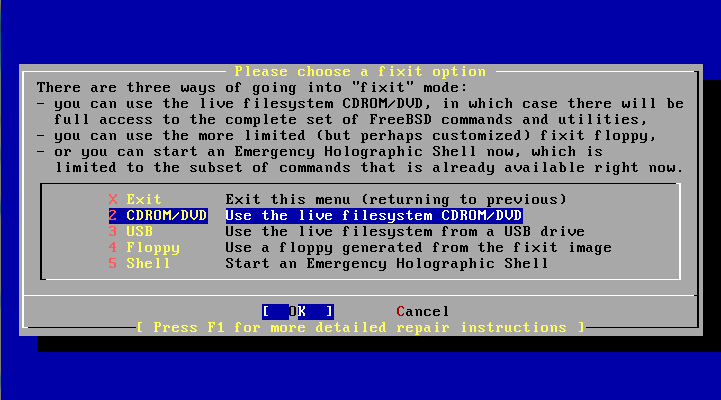
- Boot to a fixit/livefs
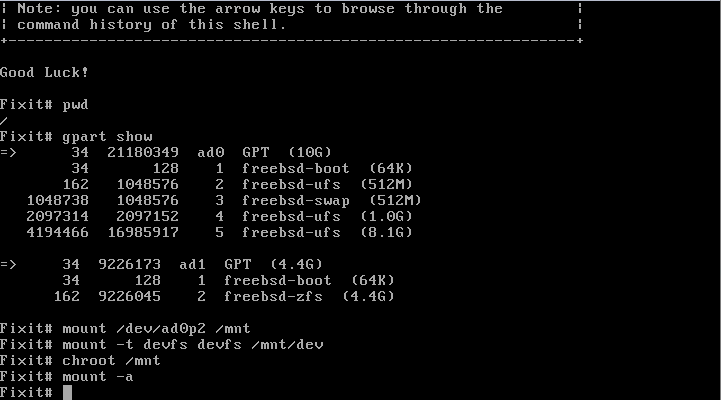
- Locate the root partition and mount to /mnt
- mount the devfs to /mnt/dev
- chroot to /mnt
- mount -a if you want to automatically bring up the other partitions
This is basic stuff, but it took me a while to learn this trick–Mainly because booting off a CD to fix something isn't a frequent occurence. The tips here are chroot and devfs.
Chroot changes the apparent root directory to someplace else. In other words it maps "/" to a subdirectory of your choosing. You can mount your broken rootfs to /mnt and then use chroot to make the current shell behave as if you had mounted the filesystem to "/". Now you can access /boot and /etc instead of /mnt/boot and /mnt/etc.
But /dev will be conspicuously missing after a chroot. That's why it's important/useful to mount devfs to /mnt/dev before doing the chroot. Then you'll be able to access your devices for mounting, partitioning, or MBR/bootloader repairs while in the chroot shell.
Here's an example from top to bottom:
Here's what / looked like before and after the chroot to /mnt:
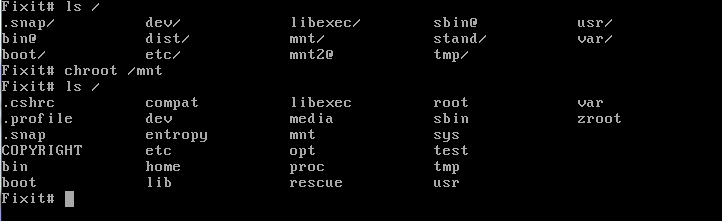
Now the userland paths are set up just as if you had booted into the broken system. This is a much better environment from which to do tests and repairs in most cases.
And just to be complete, here is how you can explicitly unhide devfs nodes (though I haven't needed to yet):
mount -t devfs devfs /mnt/dev
devfs -m /mnt/dev rule apply path null unhide
